Showing posts with label books. Show all posts

Monday, May 2, 2022

Another bowl filler

 Hello, everyone. 

I have finished another bowl filler from this lovely book my DM gave me, which is shown below.


The back side, the top photo, with decorative quilting stitches. 

The front side, at  right, with some decorative stitches and a small scattering of beads. This project was done out of stash--in fact, the center striped section was an off cut from the last little bowl filler. That explains the very similar set of colors here!


(I haven't figured out how to slide the pictures around on the post while posting from the phone. Select and slide with a finger isn't doing it, don't know why.)

Here is the front cover of the book. It's paperback and has a lot of photos of the projects to go with the text and line drawings. 

This is the project photo page that has the two I've done so far. (Top left was the first one, and the bottom one was the second.) The low-volume colors I used make mine look totally different. 


This is a cute collection of ideas for fabric scraps. 

Saturday, May 9, 2020

Reverted to "classic Blogger" and now photos work

Hello, everyone.

I tried again with the new Blogger setup. The photo upload was still not working. How these people managed to tangle up photo upload with google docs is beyond me. Maybe they should try proofreading their work.

I reverted the blog to the older format, which worked.

Now I can upload the photo of the two new Camino walking guides. They contain maps, suggestions for lodgings, brief descriptions of towns and areas of the path.

In this case, the path is the Camino Frances, which is the second-oldest of routes taken by pilgrims that begin roughly near the western Pyrenees. We walked it in 2014, going over the high route in the Pyrenees, called the Route Napoleon. (Blog posts from 2014 discuss this walk.) We would like to return to it and walk the lower route through the Pyrenees, called the Valcarlos route.


The very oldest Camino route to Santiago is the Primitivo, first taken as  royal progress/pilgrimage by the court of one of the Kings Pelayo when the relics were first rediscovered. It began in Oviedo, where his court was, and took a mountainous route to Santiago. We have not walked this route, but would like to in the future.

The oldest route from the Pyrenees (at least I think it is the oldest!) would be the Camino del Norte, which runs along the edge of the ocean. The villages are in little fjords and the path goes up and down a lot. Steeply up and down! (We walked this in 2017 and 2018, and blog posts from that time period discuss it.) The older routing connects to the French route at Arzua, and that is the way we walked.

I am not sure of the age of the Camino Portugues--interested readers can chime in their advice in the comments--but it used to run from Porto north to Santiago. Lately quite a number of people have been starting out in Lisbon. Like the Spanish routes, there are various walking options that allow one to either go inland or along the sea. We walked this in 2015, and blog posts from that time period discuss it.

Another old route is the Via de la Plata, the way of the platted road. (These days everyone remembers that "plata" means silver in Spanish and some call it the Silver Road.) This one is longer. We hope to walk it in the future.

As y'all can see, the go-slow retreat/pilgrimage on foot becomes an addiction. Also I have been privileged to visit Our Lady of Covadonga, the cathedral at Oviedo, and many other edifying churches.

It is not too much to say that I long for the days when we can walk the Camino again.


Friday, May 8, 2020

A wonderful mail delivery

Hello, everyone.

A couple of days ago we had a wonderful mail delivery: (Blogger refuses to allow me to upload the photo!)

Sadly I cannot show you the picture of the two new (current-year) Camino Frances guides. Blogger is messed up and will not let me upload a photo. It keeps hanging up in google docs...which is not where the picture is!

You know, the old Blogger worked fine most of the time. It never gave me problems with uploading photos. It never gave me problems with putting links in the posts either. And I didn't have to interpret strange symbols to begin composing a new post. 

It's ridiculous!

We got our new guide books for the Camino. These were new ones because the last time we walked the Camino Frances was 2014. (And with the China plague this spring, we had to postpone our Via de la Plata walk that would have begun right after Easter.) We decided to see if we could do a slightly shorter one later on, when Spain is again ready for visitors. We ordered the new Camino Frances guide books from Ivar Revke's shop in Santiago de Compostela. (Ivar is the proprietor of the wonderful, informative Camino Forum, which is linked in the sidebar.) 

We ordered two different books because, as with finding a new recipe, it's always good to read more than one and compare them. 

Perhaps in a few days Blogger will be working better and allow photo upload. I certainly hope so!


Sunday, October 20, 2019

The gussied-up guest book

Hello, everyone.

A few posts back I had mentioned putting up photos of the guest book as it was used.


We have many swatches of lace that were gotten for another reason. This one was chosen to decorate the front cover of the book. It is glued in place.


Inside the cover, a piece of navy blue satin to cover the raw edges. (Also glued.)


Tuesday, January 30, 2018

Heart fidget, 3rd progress report

Hello, everyone.

This is a progress update on the heart fidget. More elements have been placed and the filling of the background has commenced.

The white circles are mother of pearl beads. Their framing rows are 15 count rocaille beads. The background on the left side is mostly the 11 count transparent red seed beads. The contrast in color between the left and right background is because the rocaille beads have an iridescent finish on them. The beads are overall pleasant to touch and run fingertips over--which is really the whole point of a fidget in my opinion.

A book that the Christmas angels brought me, which is very helpful with thinking about these things, is Bead Embroidery Jewelry Products by Jamie Cloud Eakin. (The link goes to Amazon, but it may be available in your local bead or craft store. Along with the goodies beads to make the projects!)


Friday, April 15, 2016

So this was going to be the post from earlier today

Hello, everyone.

I had planned to do a post about laundry results on book cover fabrics. Unfortunately the camera chip was at the other end of the house, and it was late. So this is that post instead.

The 4 inch square of handkerchief linen shrank to just about 3 7/8 inches as y'all may remember.

It was going to be necessary to do a wash and dry cycle of the remainder of the piece of linen, just to get it ready to work with. And also to see what happened with color. I tucked the half yard of red Kona cotton muslin that was intended for an underlining to the linen, and a bunch of colored clothing that needed to be washed, into the machine on cool cycle. Ran the whole load through the dryer on "knits" which is a more-gentle heat setting.

Then laid the washed and dried--but not yet ironed--fabrics out on a chair to look at.

Left to right: Kona cotton, red handkerchief linen, red poly lining fabric
 As y'all can see, the linen went from tomato-colored to cream-of-tomato-soup-colored. The Kona held its color.

I am faced with a decision: try the linen color against the actual book color (if it matches we wink at the almost-orange shade?) or switch to using the Kona for face fabric. Or possibly another red fabric. I have tried one of the local fabric shops. I may try the other one...but IIRC they mostly focus on the really fancy stuff for formal wear.

I think I'll do a little more test stitching on the poly doupioni before giving up. The French knots came out pretty and were easy to do in a line. Actually looked better than the outline stitching did. Not as hard to go around curves, either.

Working on quilt squares

Hello, everyone.

Recently I began working on pieced squares for a baby quilt: whales. Pink, gray, the usual baby kinds of colors. Well, my usual kinds of baby colors tend toward brights, as studying the color relationships helps the baby develop his vision and intelligence. IMHO.

Color chunk assortments were already posted a week or so back.

This was exploration of blocks.

Adapted from a block in the *501 Quilt Blocks* book
 The Betterh Homes and Gardens book 501 Quilt Blocks has a whale block. (Also several ships, an anchor, and many other blocks.) The first time I tried to make it, the business with the tail just didn't work out for me. Something about the little dip between the tail flukes was not going to go together no matter what. So I eliminated the little dip. This made the whale a lot easier to put together. I also consolidated pieces where possible.
Sketched after cruising many pins on Pinterest
Hearts just seemed like a baby-welcoming pattern. This heart, however, didn't make the cut. I saved the block for future reference. (And used up some metallic prints that weren't going to go into anything anyway. Metallics tend to tarnish over time.)

The "theme-y" pieced blocks that are being used are four whales and a tugboat.
A cheerful yellow eye for the whale

Does anyone remember the cartoon, and book, about Little Toot the Tugboat?


Saturday, April 9, 2016

Fabric testing for book cover project

Hello, everyone.

Y'all may remember that there is an embroidered book cover project being considered.

The other day DH and I went downtown and looked at a new-to-me fabric shop. It was quite nice--good variety of fabrics in a variety of types. Loads of sales people, too. (Unusual for fabric shops, honestly.)

I wanted to buy some sample fabrics to test. Well, it turned out that the shop has a minimum cut size. (And it's not the size most quilters get for most of their fabrics.) I ended up buying enough to do one book cover, probably: 1/2 (almost 1/2 meter) in two red fabrics, a red poly that could be a lining and a tomato-red handkerchief linen.

Poly on left. Handkerchief linen on right.
I am currently thinking that the poly will make a good liner layer for the book cover, instead of using Kona cotton for it. (Kona will still be the underlining layer that is right under the face fabric.)
4 inch square cut and serged for shrink test

After machine wash and machine dry, the 4 inches have become 3 7/8 inches.
Well, any linen or cotton was going to need preshrinking.

Picked up a piece of red Kona cotton, too, at my local Hobby Lobby store. (Don't have any red flannel for the padding layer that is proposed, but that will likely come.) It will also go through the wash before being used.

I think that the project proposal is ready for a presentation of concept package to be prepared. (To include the proof-of-concept cover on a hymnal, embroidery samples on assorted stuffs--I'm just accumulating stitch samples in a Ziplock bag--and the fabric pieces.

Right after I preshrink that red cotton and the rest of that half-yard of red linen.


Monday, March 28, 2016

It might be ADD?

Hello, everyone.

There are multiple things going on around my "studio" these days.

There is the fitful beading based on making a necklace out of an orange glass catseye and a mix of turquoise/green/assorted beads. The catseye has been captured into a peyote setting and a small peyote strap has been added to the back. The idea is currently to have a group of strands that meet in that little strap, but have assorted accent bits between the turquoise seed beads. That's the relaxation from the other two projects.

The second project, actually been on the stove a little longer than any of the others, is a sort of feasibility exploration of a pair of matched book covers. The books don't actually match in their dimensions, but they're a set, so the possible covers should at least closely resemble each other, right?
That one is at the stage of making stitch samples to explore the way the threads, and maybe beads, behave on linen. (I already know how beads behave on several other fabric types. But maybe there should be exploration of cotton stranded floss on those other types too.) The latest stitch exploration looks like this:

The cream part is satin stitches.
The bottom half of the Rho is horizontal stitches. I'm less than enthused about that part. The top part has the satin stitches at an angle and it looks better. I also got all excited and tried out some beads along the edge of the satin stitches. These are almost all #11 sead beads in various colors of glass. No silver linings, as the silver has been known to tarnish.

And then there are the quilts. There is the Pink Explosion that was planned out and pinned and labeled but not stitched together. (I had intended that to be finished over summer.) And there is now a baby quilt in grays and pinks. That is in the fabric exploration and pattern testing phase. (I have given up on the way-cute pieced whale from the Better Homes and Gardens book _501 Quilt Blocks_ as it's been a nightmare to get all the little angled bits to go together and be the correct size. In either the 4" size in the book or a supposedly easier 8" size!)


Fabric color play. These are a mix of a few new pieces and an assortment of older pieces. With any luck, in the next several days something will sort itself out and a plan will form!

Saturday, March 19, 2016

A possible new project

Hello, everyone.

The wedding dress being done, and delivered, it's time to be doing other things.

Some studying is being done on a possible new project.

Proof of concept:

It doesn't have quite all the layers of fabric under consideration, but the layout and the method seems to work fairly well. Two layers of the flannel on the front and back cover, 1 layer at the spine, 1 layer of the muslin between the linen and flannel.

And the cover stays on when the book is opened.
Using a hymnal that was on hand--a hard cover book with some thickness to it--to stand in for the possible book to be covered, I tried out the pattern for the cover and most of the layers of padding, underlining, and outer cover. This is some green linen that was left over from another project, with quilting muslin under the linen to firm up the grain for stitching and some cotton flannel underneath so the stitches will have somewhere to go when the book is opened up on a hard surface.

I tried out stitches on another piece  of the linen, using painter's tape to get some straight lines, and also tried out some colors of cotton floss and a couple of stitches.

The 1" (2.5 cm) tape gives a straight line, and the blue tape is easy to remove and reuse. (It's a low-tack tape.)
I'm not sure that the tape is the way to get a good diamond grid, though--perhaps just use the ruler to make the lines?

Pale lavender: 1 strand, outline stitch. Pale green: 2 strands, chain stitch.
Dark green: 2 strands, outline stitch. Purple: 2 strands, chain stitch.
It's not clear yet what the design will be. If the project goes forward, it will be a nearly-matched pair of covers, for a set of similar-sized books. I'm leaning toward the linen for the face fabric, just because it's so easy to clean and accepts the stitching easily.

Other fabric options have been suggested, like polyester doupioni or light polyester jacquard. I think the second might be harder to stitch through. And the first, while it's interesting to look at, might have a scary affinity for hand lotions when it's in use. It's not always easy to get oils out of poly fabrics. The linen can soak in Oxyclean, get a gentle rinse, and then soak in soap, followed up with a rinse bath or two in bowls of clean water. Then get drip dried--not tumble dried--and have almost no wrinkles at the end of the session. There will be too much built-in structure for machine laundering and drying of the covers.

Wednesday, December 9, 2015

A refreshing bit of memories: Montes de Oca

Hello, everyone.

Yesterday was very busy, with a large party for many children, and the pleasure of working with wonderful ladies! Today I find myself needing to rest a little--rest mentally, that is, with memories of one of our 2014 Camino days.

We departed from the parish albergue in Villambistia at our usual crack-of-dawn time. We walked along seeing the dew on the flowers and watching the cloudless sky change colors. The trail wasn't a completely abandoned place, but we weren't in a huge clump of people, like you may have seen in various Camino movies (like The Way when characters depart from St. Jean.) By the time you get as far as the area of Tosantos and Villambistia everyone is thinned out and less crowded. We got to Villafranca (one of the many Villafrancas, but I can't remember which one just now) about 9:30 and had coffee.

Then we started walking over the range of hills called Montes de Oca. According to the wonderful guidebook The Pilgrimage Road to Santiago: The Complete Cultural Handbook (This book is highly recommended--get it on Kindle, read it before you go and refer to it as needed on the way.) the Montes de Oca had at one point been a nest of bandits. It's not at all flat, and there's loads of cover, and when there was only horse travel, feet travel, and slow clumsy wagon travel it was probably perfect for the robbers to hide in. These days there is a marked trail which connects to some dirt roads that were put in to service windmills. There are no services between the last village before this and San Juan de Orbigo.

A waymark on the side of the road

This looks remote, but in the distance there is another little group of pilgrims.

The bridge at the bottom of the ravine. This bit is steep, both going down and coming up. Note arrows painted on bridge.

Just for pretty!

Another pretty flower
At the end of this forested bit, you come to the old monastery of San Juan. San Juan is one of the Engineer Saints of the Camino. He had been a disciple of Santo Domingo de Calzada. After Santo Domingo (another Engineer Saint) died, he came to this place and made a monastery. Santo Domingo and San Juan were responsible for getting roads and bridges built that would never have been there at all back in the middle ages. The monastery is currently being restored. We saw the casket where the saint's remains rest and the church. The monastery was listed as an albergue in various guide books, but it was too early to stop so we ate bocadillo at the little cafe and took pictures of the church and headed on down the road.

The monastery of San Juan de Orbigo


Friday, December 19, 2014

Embellishments


Hello, everyone. I was clearing off a flat surface in my “office”—that being the room that the computer, the sewing machine, the beading stuff, and a lot of books live together in—and it occurred to me to discuss some of the books that I referred to during the Great Dress Project.
The Great Dress Project was my daughter’s wedding dress, which included a shrug and many assorted false starts. During the adventure, I bought a number of books about various embellishment techniques and formalwear/wedding projects.


One I had on hand at the beginning of the adventure was Bridal Couture, by Susan Khalje. This had been my assistant for various sewing projects over the years. When my daughter got engaged, I pulled it off the shelf and went through it again. When she settled on a shape (the first time) I used it and some off the shelf patterns to come up with the prototype strapless bodice. When she changed the bodice to include band sleeves, it was back to Bridal Couture again! I cannot say enough words about how helpful this book is. You can use it for bridesmaid dresses and high school formal dresses just as well as for wedding dresses. And its discussion of various fabrics is a good start on the process of creating the whole project.


She decided on a beaded dress, so I accumulated books on beading, to go along with one I had already: Bead Embroidery Stitch Samples, by Yasuko Endo; Beading on Fabric, by Larkin Jean Van Horn; Beyond Beading Basics, by Carol Rodgers; Fine Embellishment Techniques, by Jane Conlon; Bead & Sequin Embroidery Stitches, by Stanley Levy.

  
The one that was already here was Designer Bead Embroidery by Kenneth D. King. It was helpful, but other than the very wise advice about underlining to give structure to the fabric and using an embroidery frame, I didn't end up using actual words in it much. It did get me started on prototyping various stitch ideas, though, and that taught me a whole lot! In particular, that less can be so much more in design, and that sequins really weren’t going to be needed.

Sequins and shapes--oops, too busy! Loopy stitches--totally not needed!

Test of various floral elements and bead combinations.
This bit of testing became the springboard of the final design. (The pinkish part on the left was the keeper. Done, of course, in ivory like the dress and silvery-white.)

Here is part of it, being added to the bodice-front pieces. (3mm Swarovski perles, Miyuki size 11 seeds and size 15 rocailles)

The blue lines are the tracing lines, which are not on the actual fabric. They're on Sulky Solvy! Which, conveniently, dissolves in water. And that's what it did at the end of the beadwork.

Wednesday, December 10, 2014

Doggie love

Hello, everyone.

This morning, at our doggies' cookie time, the bag was almost empty. Oops. Forgot to put dog cookies onto the grocery list.

So--rather than going back to the grocery store for the second time in two days--it was dog cookie baking time.

My Bo Friberg pastry book has a secret recipe buried in the introduction; it's the dog cookie recipe he makes for his own dogs. I adapted it a little. Our dogs love the homemade cookies.

 The cookbook--actually the link is to the 4th edition, mine is the 3rd. I'll bet the dog cookie recipe is still there.
His recipe is basically milk-flavored. I substitute beef bouillon from the cube, and use the saved grease from frying various yummy foods on the stove instead of just pouring plain vegetable oil.
Flour, gluten flour, whole wheat flour, a wee bit of salt

The oil has been poured in.
The finished dog cookies. My buddies will love me tomorrow morning!

I used the dough hook instead of the mixing blade. I'm not sure why--just did. It worked fine. You can see below that I skipped using the spiffy dog-bone shaped cookie cutters. Strips are fine. The dogs aren't particular about the shape.
I used 5 small eggs instead of 3 large ones--drilled them with the Dremel so the shells can be used in the future. (Possibly for an Easter decoration, we'll see.) And the bouillon cubes instead of the milk powder. Because my doggies like beef-broth dipped cookies!

Monday, December 8, 2014

Post-Thanksgiving food pictures

Hello, everyone.

I did take a few pictures while cooking for Thanksgiving this year...I think it's all pies. (Yum.)

Ripe Granny Smith apples, peeled and sliced, with cranberries, sugar, flour, and a wee bit of cinnamon
 I gave the apple peels to my birdies. They weren't quite sure what to make of them.
THE pie book. Which should be brought back into print! 
 Last year I scoured the internet to find a copy of this for my sweet DIL. It has great dough recipes, fruit pie recipes, and a wonderful after-turkey-meal pie recipe. (Calls for cooked chicken, works great with turkey.)
The Cranberry-Apple pie recipe. I followed their crust instructions this time, but in future I'll stick with a solid crust, so the fruity juicy stuff won't dry out in the top half of the pie.

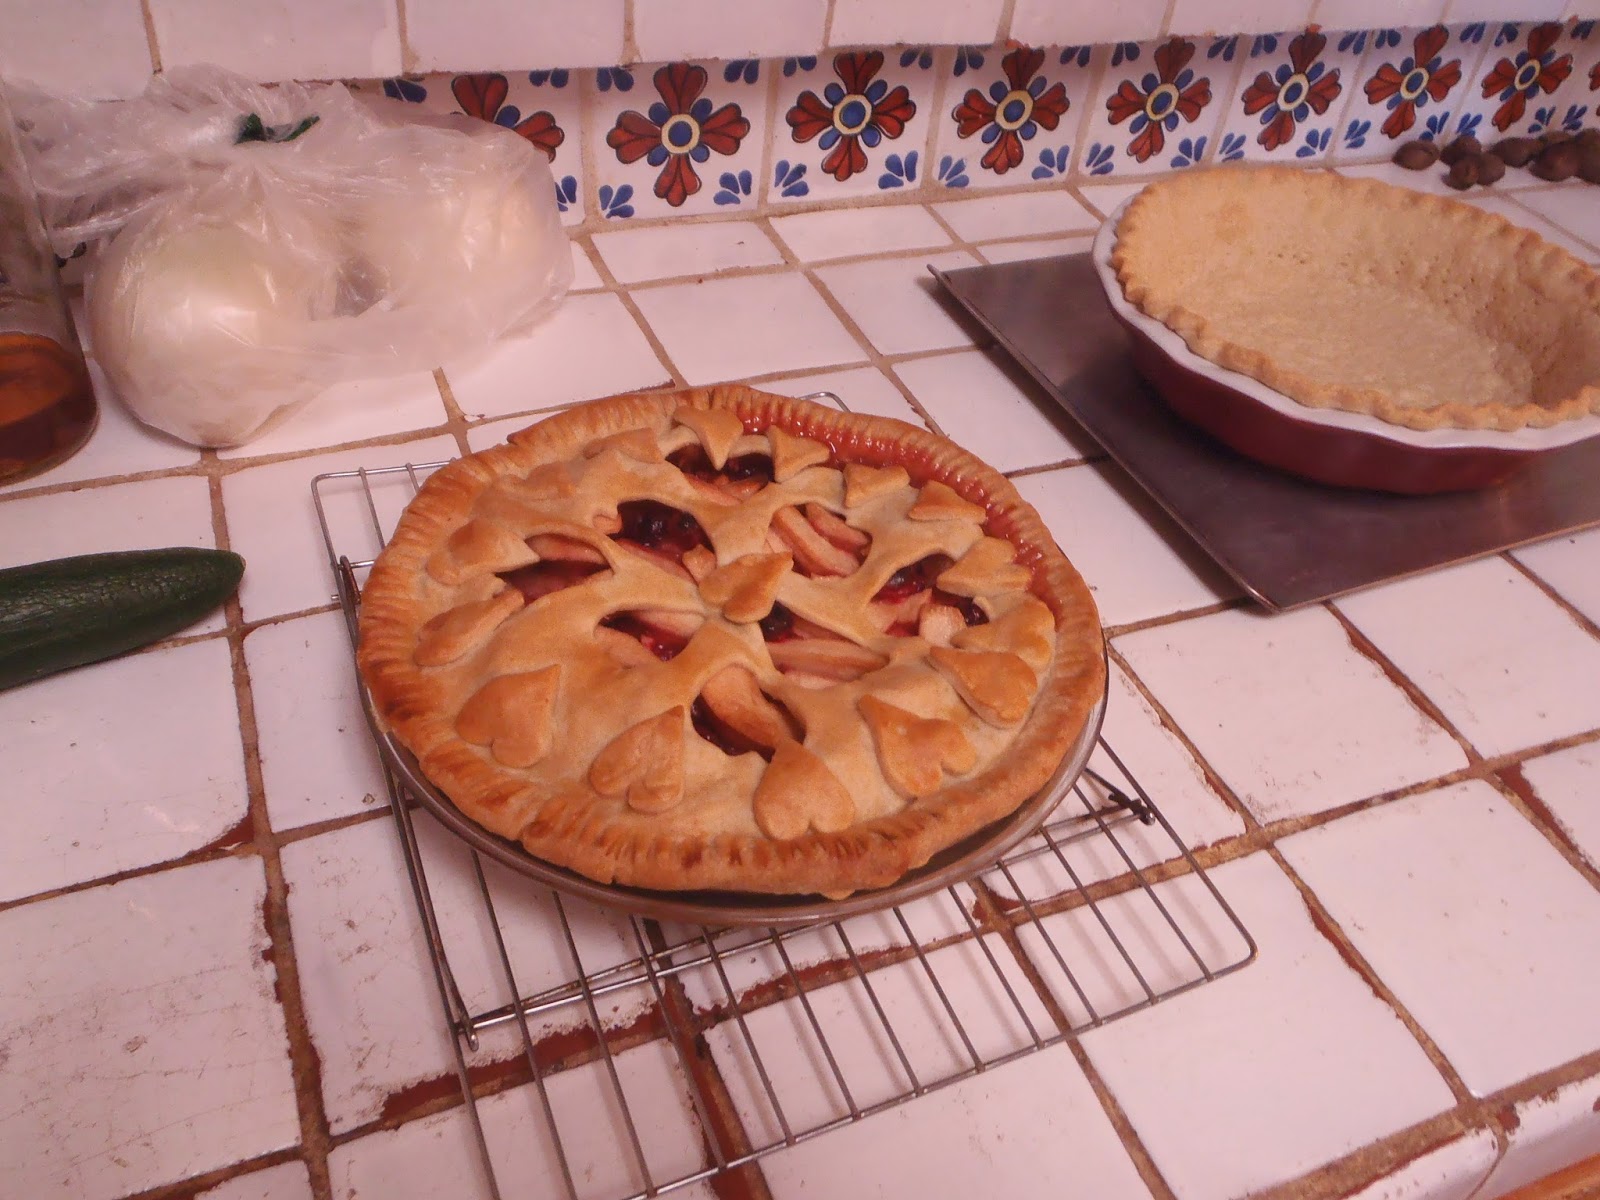
Completed Cranberry Apple pie. Crust for Lemon Meringue pie in background.

The 6 separated eggs for the lemon pie.

The foolproof lemon pie recipe. When the card looks like this, you know it's been loved.
The lemon pie is from the Blue Ribbon recipes book, hand copied years and years ago. And unlike most of the lemon meringue pie recipes I've tried, this one always thickens. It has a bit of flour to go with the cornstarch.
My sweetie made a pie, too: Bourbon Pecan pie from the Encyclopedia of Cajun Cooking. The flavor was superb, but in my opinion the filling recipe needs another egg yolk so it will thicken properly.
(I see while hunting up the link for this book that the price has risen. It's still worth it! There is a corn salad recipe, too!)

Wednesday, August 27, 2014

Miscellany

Hello, everyone.

As my friends know, I do quilting and sewing.

Progress photo of grandbaby's quilt
 As you can see from the picture, I am interested in larger designs that are made up of smaller ones--hearts made up of Log Cabin blocks, for example. I once made a wall quilt out of Log Cabin blocks that formed a gold (yellow) cross against a background that incorporated other liturgical colors.

When we walked along on the Camino, I was looking, looking--at colors, shapes, flowers, buildings, art, you name it. The emphasis on blue backgrounds and yellow arrows or shells on many of the waymarkers formed a unifying theme, colorwise, in many of the newer painted marks. There were also brass shells on sidewalks, stone patterns in pavement, and so on. We passed a house that had covered the low wall of the flowerbed with about 100 shells. There was also a building in the last part of the trail that had a 15 or 20 foot tall white shell on the side of it. The shells, the arrows, the cross of Santiago--they bring back to me the memories of the pilgrimage.

Trail marker in the Montes de Oca--rocks and pine cones!--at the edge of the mud road.


The yellow arrow, usually spray painted like this one, is probably the most famous trail marker on the Camino Frances.

This was both a boundary marker and a trail marker.


And when we got home I wanted to find a way to put some of the things I'd seen into quilts, or seed bead patterns, or other creative things. That was part of why I made the Cafe Press shop--using our photos to make gifts--and it was also why I have been trying to figure out how to make a scallop shell quilt block.


Initial draft of an applique scallop shell design
The first attempt you see here was built from a Dresden plate pattern. I used the neato cutting guide to cut different lengths of wedges, from 2 1/2 inches on up to 4 inches, and then sewed them together and folded the ends to make a more shapely shape. Then I attached it to a background and sewed a line down each seamline and down the middle of each wedge. A section of a circle and a rectangle completed the shell.

On the good side, the wedges are already set up to do a circle, or a half circle. On the bad side, they're too fat to really work well. And the edges on the sides are too square I think. So I'm not sure that it works really well.

Maybe I should try again, with a different shape at the start, and let the top-stitching do all of the tracing of rays on the shell. If I come up with something better, I'll do a follow-on and let you all see it. For now, I think a little more study and contemplation are required.


Saturday, May 17, 2014

We're off! And a few thoughts to fly on


By the time you read this, we will be en route to St. Jean Pied de Port in France. I expect that I will be able to post from time to time, from internet cafes in cities, but not every day. Pictures will probably wait until our return. I therefore decided to mention something that doesn't require photos today. (Spearing my knuckle on the rose bush this morning only helped that idea along. Now I am holding ice to my swollen hand to get the huge "ball" to go down!)
 
Two years ago, when my sweetie first proposed that we make this pilgrimage together, we didn’t know very much about it at all. So, this being the Internet age, we looked it up online.

We found books at Amazon.com. Our family gave us other books for Christmas. (As well as Buffs for each of us—Lycra neck wraps that can either be hats or neck scarves or face covers.) One was from National Geographic, The Ultimate Hiker’s Gear Guide, by Andrew Skurka. Another was a map book, from pilipalapress.com--water resistant paper, too.

We found books at our local Barnes and Noble, too—well, one that we bought there: DK eyewitness Travel: Northern Spain. It has pictures, but it really doesn’t consider most of the Camino route to be in its area of discussion. There is information about Santiago de Compostela, with pictures and diagrams of various parts of a cathedral, etc.

From Amazon, in paper and Kindle formats, all that I could remember or find on the shelf: 

To the Field of Stars, by Fr. Kevin A Codd. A Camino memoir.

Seven Tips to Make the Most of the Camino de Santiago, by Cheri Powell

Hiking the Camino: 500 Miles with Jesus, by Fr. Dave Pivonka. A Camino memoir.

1001 Most Useful Spanish Words (Dover Language Guides Spanish) (Kindle format). Because I have such a small vocabulary. British English seems to be the author's normal speech form, not American English.

Grandma's on the Camino: Reflections on a 48-Day Walking Pilgrimage to Santiago, by Mary O'Hara Wyman (Kindle format). A Camino memoir.

Walking Guide to the Camino de Santiago History Culture Architecture from St Jean Pied de Port to Santiago de Compostela and Finisterre (CaminoGuide.net eBooks), by Gerald Kelly (Kindle format)

The Pilgrimage Road to Santiago: The Complete Cultural Handbook, by David M. Gitlitz & Linda Kay Davidson (liked it so much in paper that I bought it again in Kindle to carry)

A Pilgrim's Guide to the Camino de Santiago: St. Jean * Roncesvalles * Santiago (Camino Guides), by John Brierley (We also have the map-only book he put out. Yes that means we have accumulated 2 water-resistant paper and 1 Kindle map books. Plus the Gitlitz & Davidson which has some map information in it also.)

I have learned from every one of these books. From Father Codd’s book, I learned that many of the churches along the way have Adoration chapels. (Capilla de la SantĆ­sima)
From Ms. Powell’s book, many helpful suggestions on packing.
From Ms. Wyman’s book, that I would need trekking poles. (Yes, they are talked about a lot—but this lady fell on her behind, with flip, twice on her first day, and again on the second day, but after she bought poles in Pamplona she didn’t fall down any more. Since “Grace” is not my middle name ;-) I learned from her experience and bought the poles.) Also, she found freezing rain and icy slush in mid to late May on the meseta--warm South Texas it isn't!

An especially informative resource on the web is http://www.caminodesantiago.me/community/ The Camino de Santiago Forum, with about a bazillion different discussions to read. 

It's going to be an adventure.